If you’re looking to save energy or create a unique atmosphere in your home, a dimmer switch is a great way to do it. Installing a dimmer switch is a relatively simple process that can be done in a few easy steps. However, in Australia, according to the law, all electrical wiring must be done by a licenced electrician in order to ensure safety. Nonetheless, it can be useful to understand the process before calling a professional.
What Is a Dimmer Switch?
A dimmer switch is a device that allows the user to adjust the intensity of the light from the fixture. This can be done by dimming the light to a softer level or brightening it up for a more vibrant effect. Dimmer switches are especially effective in creating a cosy atmosphere in living rooms and bedrooms.
Tools Required to Install a Dimmer Switch
Depending on how the existing switch is wired, you may need to buy some additional tools and materials before beginning the installation. Here’s a list of items you’ll need:
- Electrical tape
- Wire strippers
- Needle-nose pliers
- Flathead screwdriver
- Voltage tester
- Dimmer switch
The Installation Process
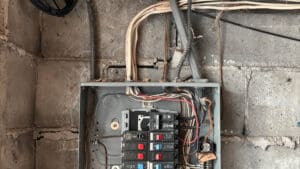
1. Turn off the Circuit Breaker
Safety is key when it comes to any electrical work, so the first step is to turn off the circuit breaker that supplies power to the light fixture. This will ensure that you don’t get electrocuted while working.
2. Remove the Existing Light Switch
Next, you will need to remove the existing light switch. Unscrew the screws that hold it in place and gently pull it out of the wall. Once you’ve done that, you’ll be able to access the wiring behind the switch.
3. Connect the Wiring
Now it’s time to begin connecting the wiring. To do this, you will need to connect the hot wire (typically a black wire) to the black terminal on the dimmer switch. Then, connect the neutral wire (typically a white wire) to the white terminal on the dimmer switch. Finally, connect the ground wire (typically a green wire) to the green terminal on the dimmer switch.
4. Install the Dimmer Switch
Once the wiring has been connected, you’re ready to install the dimmer switch. Slide the dimmer switch into the wall, making sure that it is level and secure, then screw it into place.
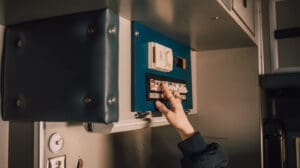
5. Turn on the Circuit Breaker
Once the dimmer switch is installed, it’s time to turn the power back on. Turn the circuit breaker back on and flip the switch to check that the lights are working properly.
6. Adjust the Settings
The final step is to adjust the settings on the dimmer switch. To do this, turn the switch on and off several times until the lights are at the desired level.
Safety Tips
It’s important to take safety seriously when installing a dimmer switch. Be sure to always turn off the circuit breaker before starting any work and wear appropriate personal protective equipment, such as gloves and safety glasses. If you’re unsure of any part of the process, it’s best to call a professional electrician for help.
Express Tech Electrical Services is equipped to help you with any electrical work, including dimmer switch installation. Our team of experienced electricians will ensure that the job is done safely and correctly. Contact us today for more information.
Related posts: